


This will be just a quick update on the PC build since it was a rather minor change to the build so far. In my first post about the PC build I included a Pic of the PC internals. In this you can see that I am using a Spider-Man Funko Pop to hold up the RTX 3060 because it had considerable GPU Sag.
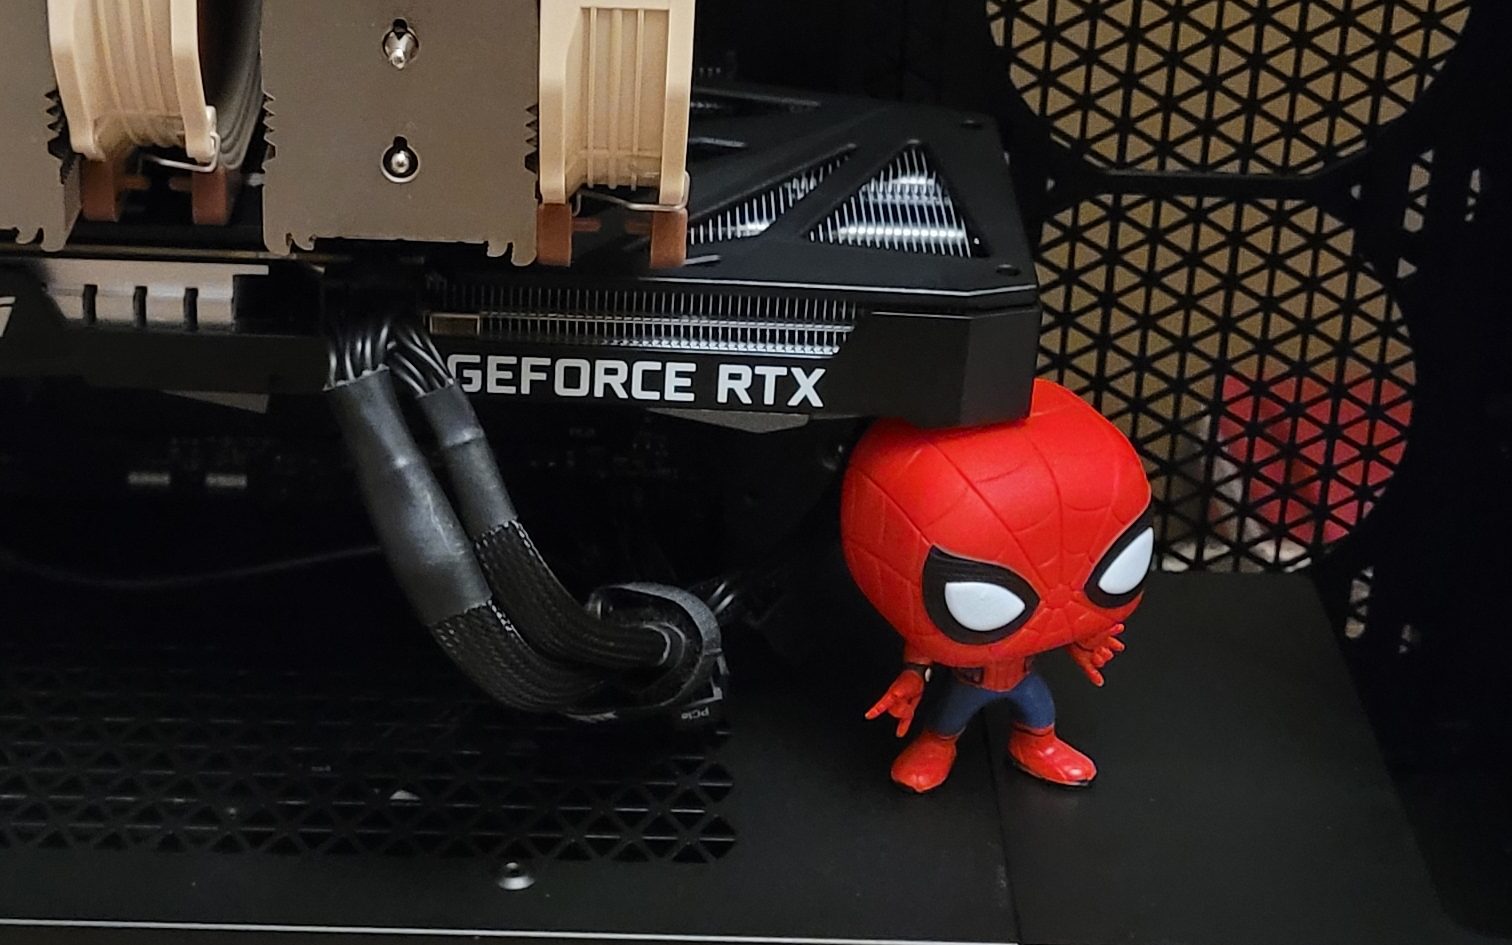
Spider-man was always intended to be a short term solution. It was actually a pretty functional option. Since it was a bobblehead, the internal spring let me compress it to slide under the GPU then release it to fit into the space needed. I tried some other Funko Pops that weren’t bobbleheads first but they were just slightly too tall and had no flexibility, so Spider-Man it was.
It should be noted that this was a very viable solution. If you have GPU sag when building a PC, consider this if you already have a bobblehead lying around. That being said, I wanted something different for my build and I wanted to relieve Spidey of his task as GPU Atlas. Plus, I never pass up an excuse for a new project.
So, I went into the shop and found a scrap piece of angle aluminum and got to work. I had measured the height of Spidey under load and found that he was approximately 3.5 inches tall. The aluminum piece was longer than that so I cut a notch out of it that would make it 3.5 inches tall when set up.
Next I cut a chunk of the unnotched side off and drilled a series of holes in the remaining aluminum so that it doesn’t interrupt the airflow of the case.
Having finished the functional elements, it was time to add some flair. To do this I decided to add a textured powder coating finish to it that is similar to the coating on the case itself. Then, I found an image of Seras Victoria from Hellsing and imported it into Inkscape.
In Inkscape, I made the image grayscale and then traced the bitmap image to turn it into a vector. After that I exported it to a file type that the laser at my work could read.
Next was the moment of truth. After a long time of fixturing the piece and lining up the laser, it was time to cross my fingers and fire the laser.
It took the laser a few tries to get through the powder coat but ultimately it got the job done. I, personally, think that it turned out great so I took it home from the shop and got to swapping it into the PC to replace Spidey. Overall, it was a success so far.
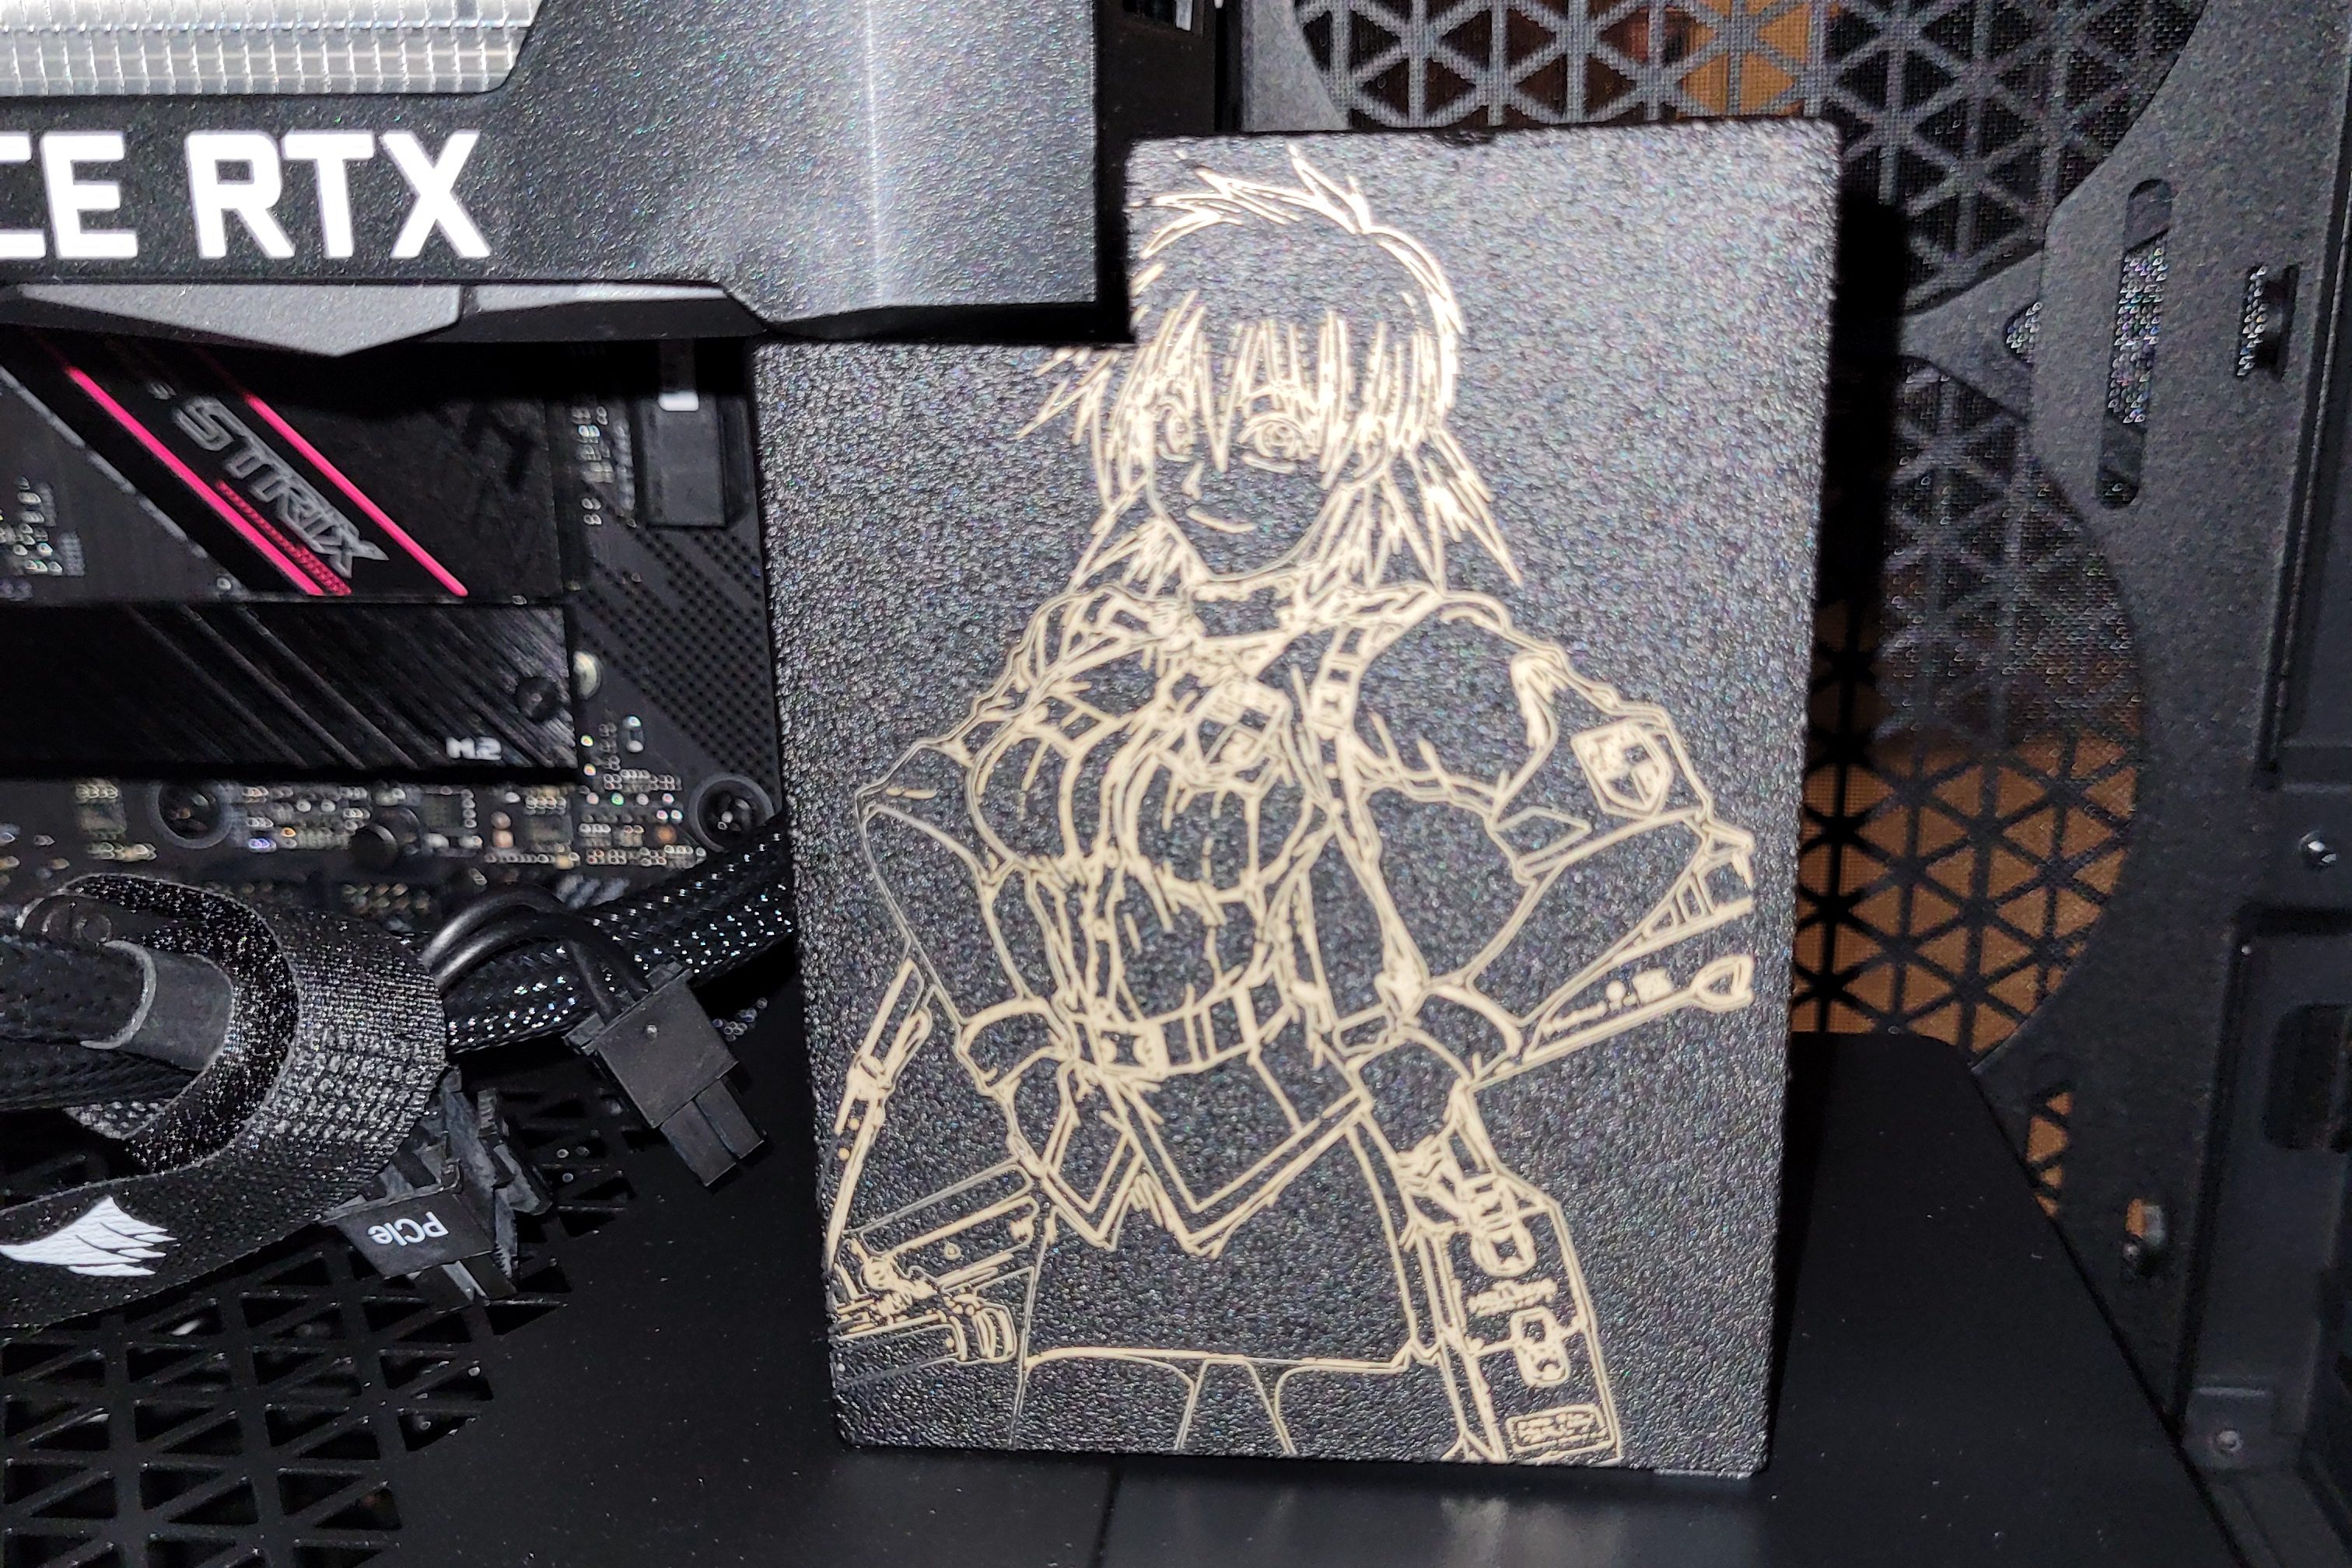
The main caveat to this is that because the glass on the side of the case is tinted, you can’t really see the GPU stand very well which is a little annoying after all the effort but I knew that would be the case. My intention is to add some of that sweet RGB to the case when I get around to upgrading the case fans. Once I do that, I’m hoping that the RGB light will reflect off the raw aluminum that the laser marking is exposed from beneath the powder coat, giving the image of Seras a glow that can be seen through the tinted case glass.
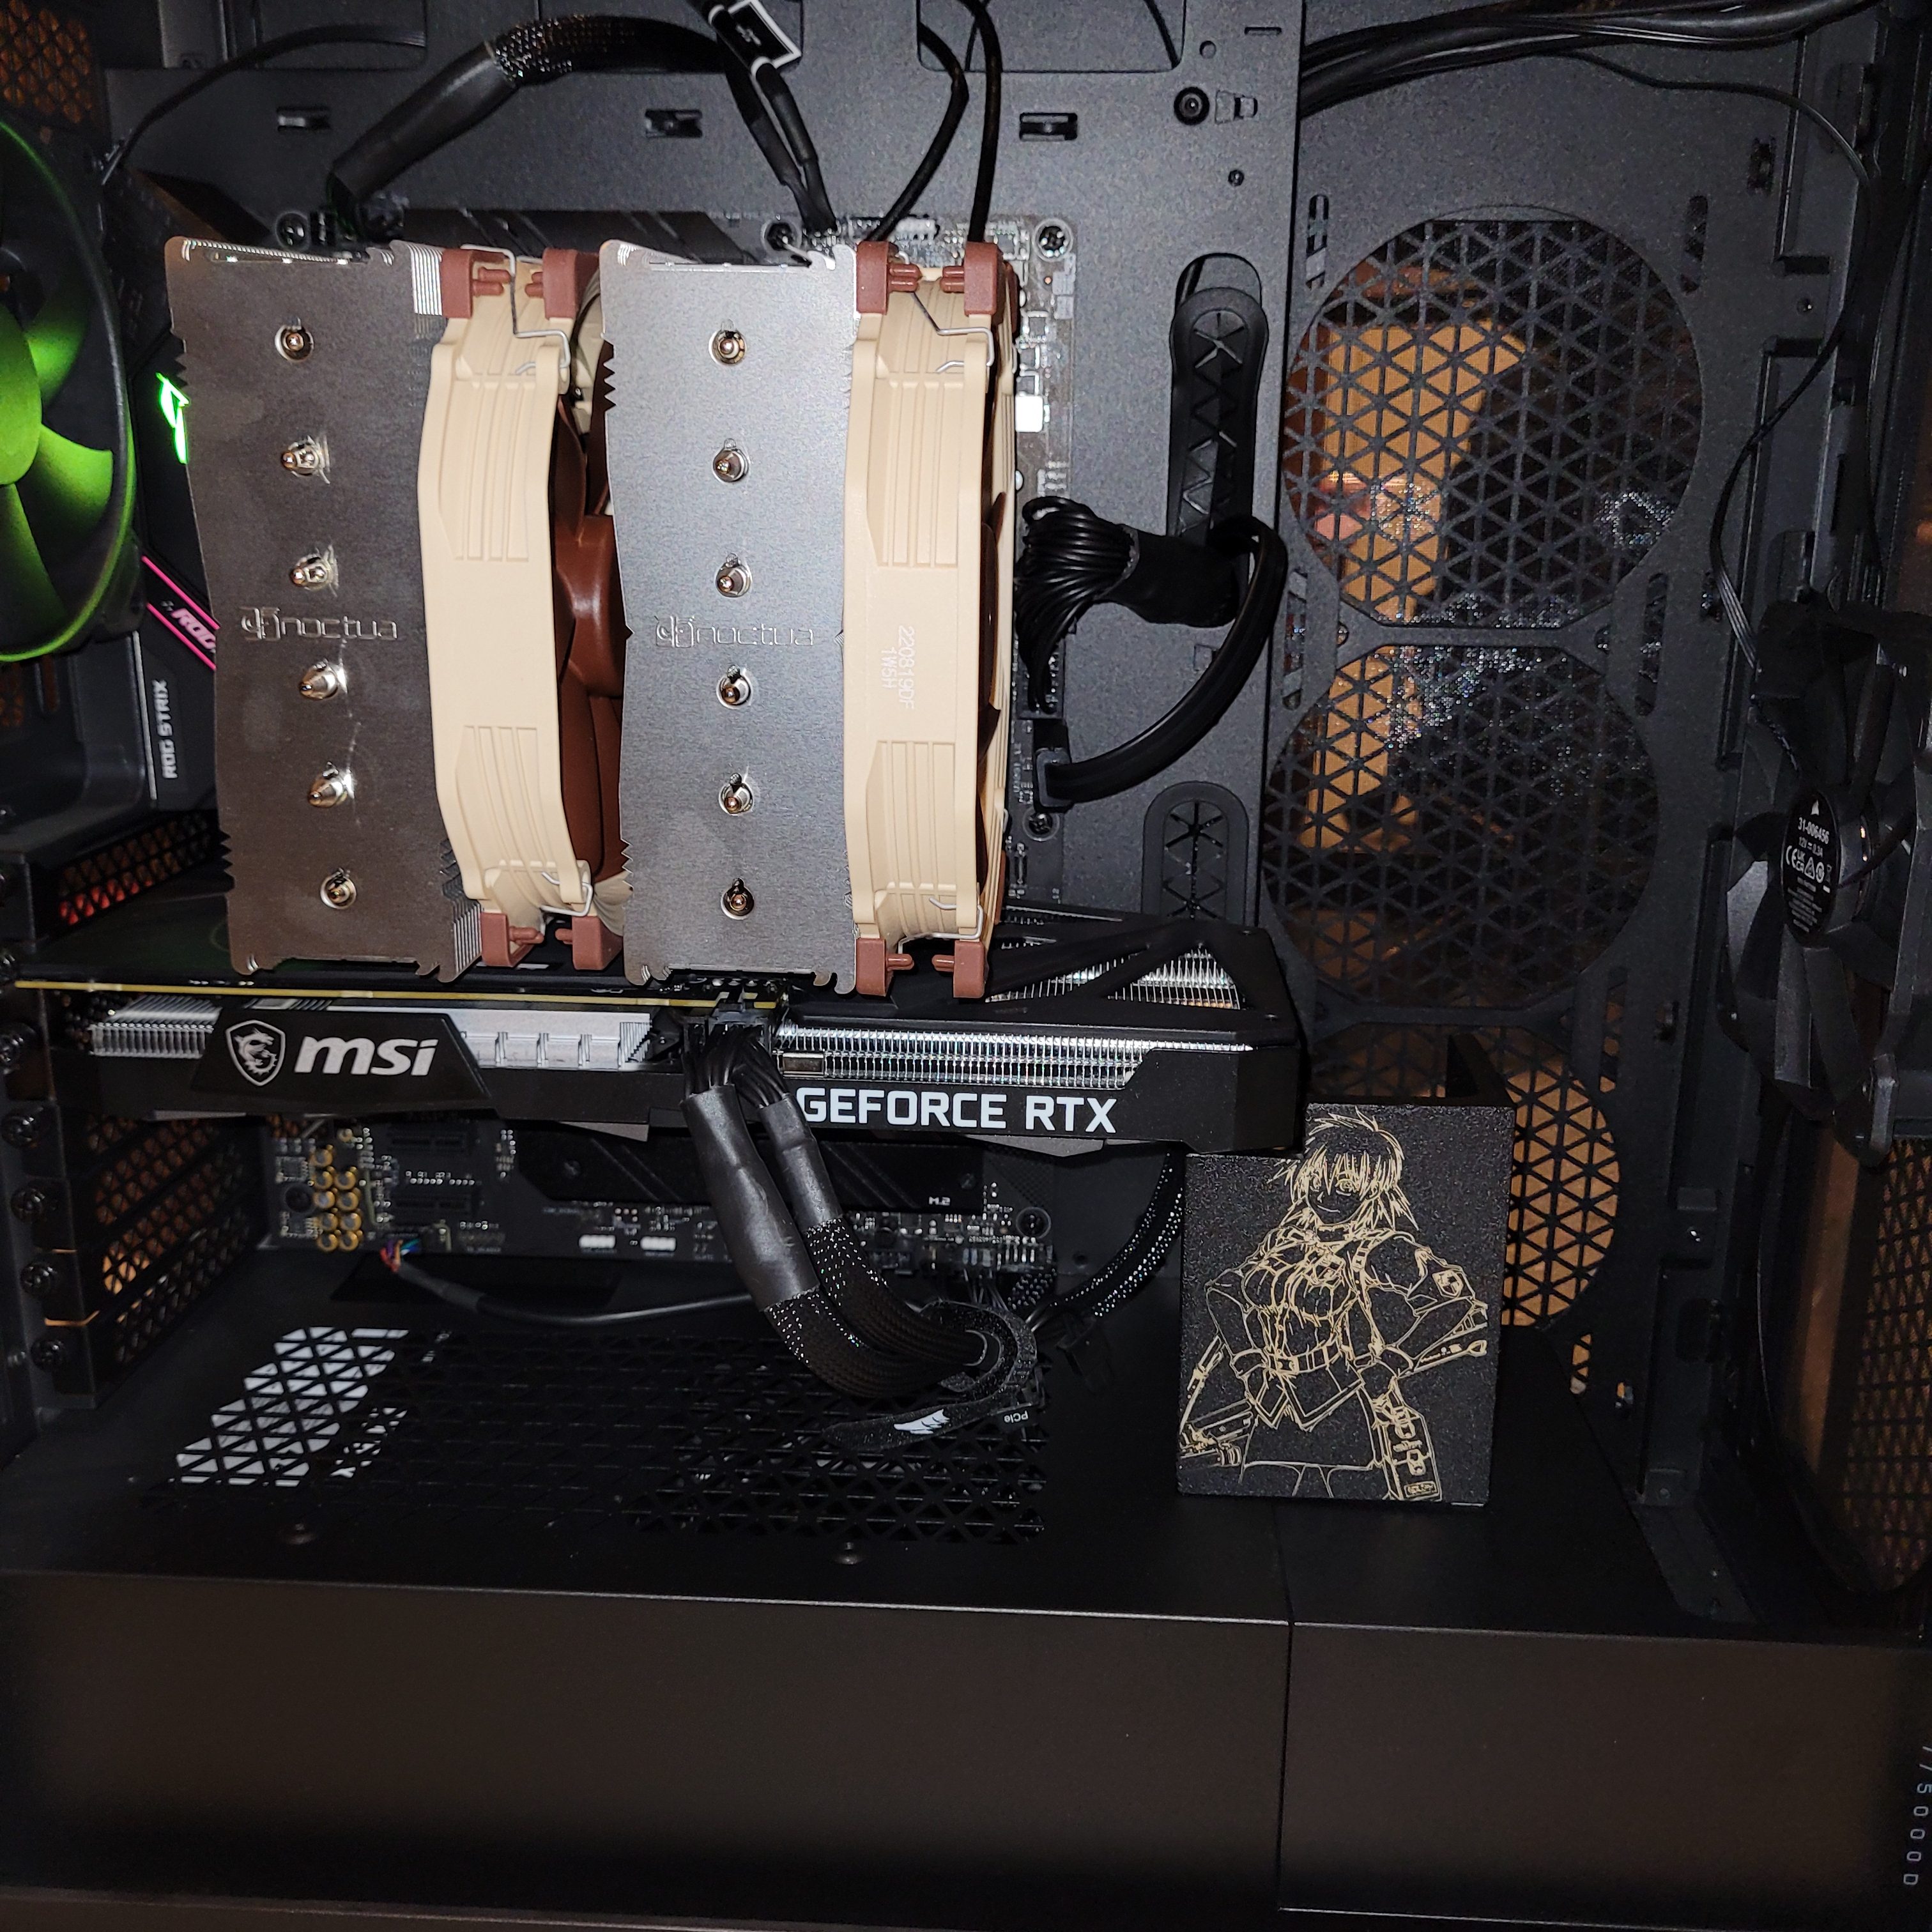
So, with all that done, Spidey has been freed from his fate of holding up the 3060 and can return to his rightful place on the shelf in the office. Best of all, it is super validating to finish my first tinkering project on the PC and I’m very excited to work on it more in the future.

Leave a comment